The allure of creating your own NFTs and BRC-20 tokens is undeniable. For artists, owning and monetizing their digital creations through NFTs offers a new level of control and potential financial reward. Beyond the realm of art, NFTs can foster passionate communities, grant exclusive access to events, and even act as fundraising tools.
However, stepping into the world of token creation isn’t without its challenges. It demands both a technical understanding of blockchain technology and smart contracts, along with a careful consideration of financial risks and potential regulatory implications. Before diving in, it’s crucial to assess your goals, resources, and risk tolerance. While the possibilities are vast and exciting, responsible and informed action is key to navigating this rapidly evolving landscape.
NFTs, or Non-Fungible Tokens, are digital assets that represent ownership or proof of authenticity for specific items or content. Unlike fungible cryptocurrencies like Bitcoin or Ethereum, NFTs cannot be exchanged on a one-to-one basis due to their unique nature.
NFTs are typically created and traded on blockchain platforms such as Ethereum, Binance Smart Chain, and decentralized marketplaces like OpenSea. These platforms utilize smart contracts to establish ownership and enable transparent and immutable transactions for NFTs.
NFTs can represent a wide range of digital items, including artwork, music, videos, virtual real estate, and collectibles. Each NFT has metadata describing the item it represents and a unique identifier that sets it apart from other NFTs
Creating NFTs On The Ethereum Network
The primary stage in the creation of NFTs involves identifying the content you wish to associate with your NFT. Consider the specific representation you desire for your NFT, whether it be digital artwork, collectibles, virtual real estate, or any other distinct digital item.
In this article, we will use illustrations from OpenSea to guide you on the steps you need to create your own NFTs. OpenSea stands as a leading decentralized marketplace built on the Ethereum blockchain, dedicated to NFTs. It creates a space where users can engage in buying, selling, and discovering an extensive array of digital assets, encompassing artwork, virtual real estate, collectibles, and more.
OpenSea delivers a user-friendly interface, showcasing a vast selection of NFT listings curated from diverse creators and projects. Through OpenSea, users gain the ability to explore the NFT community, partake in auctions, and securely manage their digital assets. With a commitment to fostering the expansion and accessibility of the NFT market, OpenSea ensures a seamless experience for enthusiasts and collectors alike.
This step-by-step guide covers how to create an NFT collection and mint directly to your wallet.
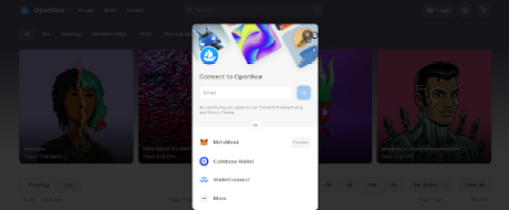
First, visit the original OpenSea website, and click on the “Login” button at the top to connect your preffered wallet.
To figure out the best wallet to use on the Ethereum network, check here.
Next, click on your “Profile Icon” at the top right of your OpenSea interface in order to deploy a smart contract and select “Studio” through the pop-up options.
To initiate the creation of a fresh NFT, simply click the “Create” button located at the top right corner.
When you explore the options, you will find the choice to either Drop a collection or Create/Mint an NFT. Selecting “Create an NFT”. This will enable you to mint an NFT directly into your wallet.
Once you proceed, a fresh “Create an NFT” screen will be presented. If you are using OpenSea Studio tools for the first time to create an NFT, select “Create a new collection.” You will be able to add one NFT to this collection initially, with the option to include more NFTs at a later stage.
After selecting “Create a new collection,” you will be guided through the steps on your screen to deploy a smart contract. This process will enable you to create NFTs for your newly created collection.
To customize your contract, you need to add a logo image, choose a contract name, and designate a token symbol. Additionally, you will need to choose an EVM blockchain. It’s important to note that deploying a smart contract incurs gas fees, and the estimated fees for each blockchain will be displayed. If the fees are higher than anticipated, you can revisit the process at a later time, as they are subject to change based on network activity.
When you are prepared, proceed by clicking on “Continue”. This action will prompt a transaction signature request in your wallet, which will necessitate gas.
Once the process is finalized, you will receive a confirmation message. Proceed to the next step by selecting “Create an NFT” as shown below. :
Having successfully created a smart contract, you are now prepared to generate an NFT. It is important to note that once your item is minted, further editing becomes impossible as it permanently resides on the blockchain. In this case, you will be creating an ERC-1155 NFT, which allows for the creation of multiple copies of the same item.
To begin this phase, upload the media for your NFT, which represents the artwork associated with it. Next, choose the collection in which you wish to mint your NFT.
Subsequently, provide a name for your item and set the desired item supply. The item supply determines the number of copies you wish to mint for the NFT. If you choose 1, then the item will be a one-of-one.
Next, click on the “Create” button at the bottom right, as shown in the above image. A loading message will appear as the item is being minted. To proceed with the minting process, you will need to approve the transaction using your wallet.
Congratulations! You have successfully minted your very first NFT!
Conclusion
Although NFTs and BRC-20 tokens have distinct functions and operate on separate blockchains, they both contribute to the growing realm of blockchain-based digital assets. NFTs have captured widespread interest for their exceptional nature and capacity to represent ownership of digital assets.
This news is republished from another source. You can check the original article here

